How to Assemble Your Own PCB Paste Reflow System?
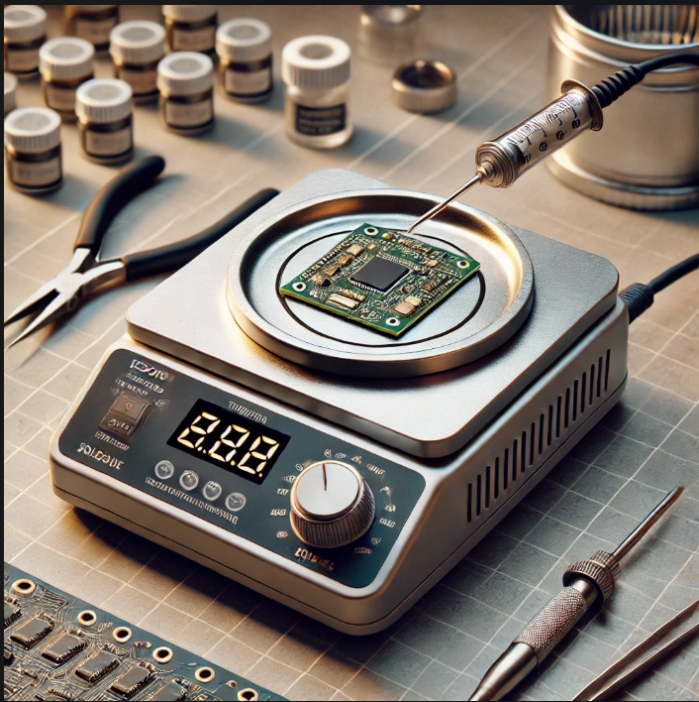
Table of Conent
Table of Conent
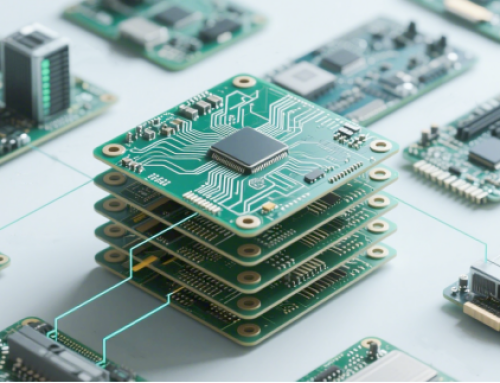
The PCB is the main part of all modern electrical gadgets. Finding an affordable and dependable method for soldering components on the surface is crucial for small-scale producers and electronics enthusiasts. One popular DIY solution is a PCB paste reflow system using an induction skillet. This guide walks you through the process of building and using your own system, covering everything from materials to operational steps.
Understanding PCB Paste Reflow
To join surface-mount components, reflow soldering entails melting the solder paste on a PCB’s pads. A controlled heating profile ensures proper melting without damaging sensitive components. While professional reflow ovens are ideal, they can be expensive. An induction skillet offers an affordable alternative for small-scale use, providing sufficient precision to handle basic reflow tasks.
Materials and Tools Needed

1. Induction Cooker or Skillet: Choose a flat induction cooker with adjustable temperature controls. A digital temperature display is highly recommended.
2. Plates of Flat Metal: Make use of an induction-compatible plate made of cast iron or steel. It ought to be level and big enough to fit your PCB.
3. A Thermocouple-equipped Temperature Controller (optional): For precise temperature monitoring and control, use an external thermocouple and controller.
4. Solder Paste: Select the solder paste suitable for the project. There are two types: lead-free and leaded, which are easier to deal with but less environmentally beneficial.
5. Optional PCB Stencil: Applying solder paste to the PCB precisely and consistently is ensured using a stencil.
6. Tweezers and Small Tools: Use tweezers for placing surface-mount components. Other helpful tools include magnifying glasses and clamps.
7. Kapton Tape or Heat-resistant Tape: For securing components or insulating areas of the PCB.
8. Ventilation System: Ensure proper ventilation to safely manage fumes generated during the reflow process.
Preparing the Induction Skillet
1. Place the Metal Plate Position the flat metal plate on the induction cooker. The plate acts as the heat transfer medium, ensuring even distribution of heat across the PCB.
2. Test Heat Distribution Heat the plate to a moderate temperature (~100°C) and use a thermometer or thermal camera to check for uniform heat distribution. If uneven spots are detected, consider a thicker or higher-quality metal plate.
Applying Solder Paste to the PCB
1. Clean the PCB. Verify that the PCB is free of dust and grease. When cleaning, use isopropyl alcohol if required.
2. Use paste for solder. Apply solder paste uniformly to the pads using a stencil. Solder paste can be manually applied to each pad using a fine-tipped syringe if a stencil is not available.
3. Inspect the Application. Ensure solder paste is applied precisely, avoiding smears or excessive quantities. Improper application can lead to solder bridges or weak joints. Placing.
Surface-Mount Components
1. Organize Components. Place components on the PCB in the order that they will appear. This reduces the possibility of errors and accelerates the process.
2. Place Components. Using tweezers, carefully position each component onto the solder paste. Ensure proper alignment with the pads.
3. Secure Components. For larger boards or components, use Kapton tape to hold parts in place during the heating process.
Reflowing the PCB
1. Preheat the Skillet
Set the induction cooker to a low temperature (~150°C) to preheat the metal plate. Allow the PCB to warm gradually to avoid thermal shock.
2. Follow the Reflow Profile
• Adjust the temperature in stages to match the solder paste’s specified reflow profile:
• Ramp-Up Phase: Increase the temperature to ~180°C at a steady rate.
• Soak Phase: Maintain ~180°C for 6090 seconds to allow even heating.
• Reflow Phase: Increase the temperature to the peak range (typically 220°C to 260°C) for 3060 seconds. At this point, the components are bonded to the PCB by the melting solder paste.
• Cool-Down Phase: Switch off the heat source and let the PCB gradually drop to room temperature.
3. Monitor Temperature
Keep an eye on the temperature To determine the PCB’s surface temperature, use a thermocouple.
Post-Reflow Inspection
1. Visual Inspection Examine the solder joints. Solder that has been reflowed properly should be smooth and shiny. Check for common defects like solder bridges or cold joints.
2. Examining functionality To make sure every component works as planned, test the PCB. Use a multimeter or circuit tester as needed.
3. Rework If Necessary For minor defects, use a soldering iron to touch up problematic areas. For major issues, consider reapplying solder paste and repeating the reflow process.
Safety Considerations
• Ventilation: During the reflow operation, solder paste releases fumes. Either operate in an area with adequate ventilation or use fume extraction equipment.
• Personal Protection: Wear heat-resistant gloves and safety eyewear to protect yourself from hot surfaces.
• Fire Safety: Keep anything flammable away from your induction pan and keep a fire extinguisher close at hand.
Tips for Success Practice with Scrap Boards.
If reflow-soldering is new to you, practice on scrap PCBs to hone your skills.
• Make Use of High-Quality Materials Superior components and solder paste can greatly enhance outcomes.
• Optimize Heat Distribution: If heat distribution is uneven, try using a different metal plate or adjusting the placement of the PCB on the skillet.
• Document Settings: Keep a record of successful temperature settings and reflow profiles for future reference.
• Advantages of a DIY Reflow System Cost-Effective: An induction skillet-based system is much cheaper than commercial reflow ovens.
• Customizable: Tailor the system to suit your specific needs, such as PCB size or solder type.Portable: An induction skillet setup’s small size makes it simple to move and store.
Conclusion
Assembling your own PCB paste reflow system using an induction skillet is a practical and rewarding project. Professional-grade soldering can be achieved with meticulous planning, meticulous attention to detail, and respect to safety regulations. Whether you are working on prototypes or small production runs, this DIY solution provides a reliable and affordable alternative to commercial reflow ovens.
Latest Blog


Contact Info
Phone: +86-755-82882936
Email: [email protected]
WhatsApp: +86-13570802455
Wechat: +86-13570802455
Address: 2nd floor,D Bldg.,Electric Link Technology Bldg.,Gongming,Guangming New Dist.,518106 Shenzhen, China