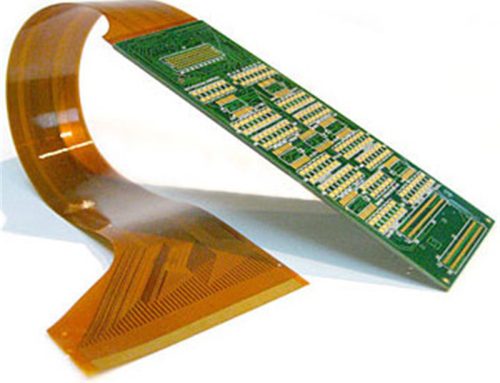
Why Are PCB Stencils Key to SMT in PCB Assembly?
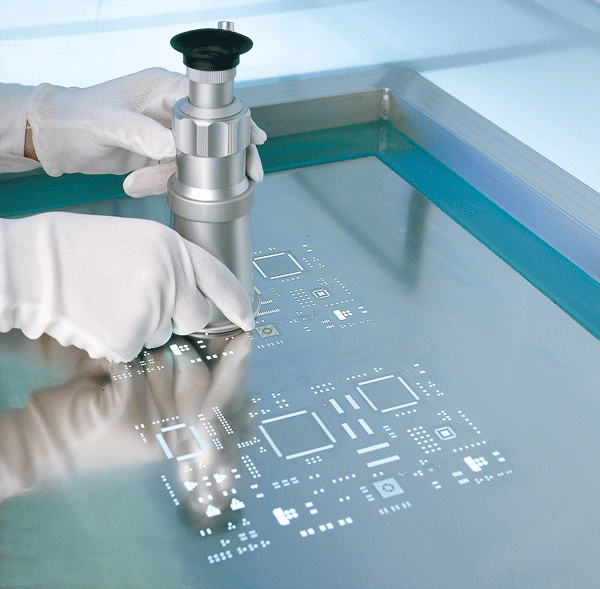
Table of Conent
Table of Conent
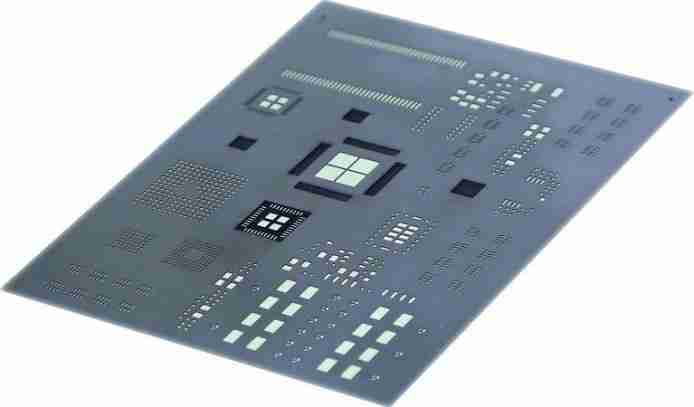
PCB stencils are metal plates with precisely cut openings. They have a very unique design. They make it possible for adhesives and solder paste to flow through the holes. Their only function is to design the appropriate surface mount component arrangement.
They align with the pad pattern on the board. They act like a mask for the solder paste. All openings correspond exactly to the pads on the board. Typically, the metal is nickel or stainless steel. Generally speaking, the thickness ranges from 3 to 8 mils, contingent upon the design specifications.
Framed and frameless stencils are the two main varieties of PCB stencils. Sturdy metal frames are used to install framed stencils. Framed stencils are mounted in a rigid metal frame. Subsequently, frameless stencils remain flexible and easy to use manually. Modern stencils are usually laser cut to ensure precision. The tolerance of this cutting technique can be as low as ±0.0005 inches.
Types
1. Framed Stencils
Framed stencils are permanently attached to a metal frame. The frame stabilizes the printing. Automated assembly lines are the ideal environment for these stencils. Over the whole surface, they offer the same tension. The majority of high-volume producers use framed stencils.
Additionally, you should know that they cost extra. But they are more durable. Additionally, this kind of frame keeps from warping with prolonged use. Perfect alignment is guaranteed by the tensioning system. Furthermore, even after thousands of printings, the surface quality remains constant.
2. Step Stencils
The thickness of the step stencil varies. The “thicker” the area, the more solder paste is deposited. For fine-pitch components, thinner sections can be used. As you know, they can handle the challenge of mixing components.
These steps stop solder bridges. This style works well for boards with varying component sizes for a greater understanding. The step ratio is usually between 1:1.5 and 1:2. For this reason, precise processing tolerances for each step are very important. For optimal printing results, the thickness should be varied step by step.
3. Frameless Stencils
In general, frameless stencils are similar to flexible metal sheets. Since they are less expensive than framed stencils, they are well-liked. In addition, frameless stencils are better suited for small production runs.
Several prototype labs have used this model for testing. Hand printing works well with frameless stencils. Four to six mils is the usual thickness. You will typically see alignment positioning markers.
Importance
As mentioned earlier, PCB stencils have a direct impact on production quality. For instance, flawless paste deposition is guaranteed with the correct stencil.
Poor stencil quality contributes to high defect rates in PCB assembly businesses. Why is this common? The reason is inaccurate paste placement. Using a stencil can save hours of production time. Due to the speed demanded by modern electronics, it is no longer practical to paste solder by hand.
With thousands of orders per machine, manual solder paste cannot meet deadlines. Therefore, precise solder placement can effectively fulfill this need. Now you know that modern BGAs require perfect solder paste deposition. Only stencils can achieve the required precision. This precision is very important for smaller parts.
How Do I Choose the Right Stencil?
1. The kind of stencil used depends on the board’s arrangement. High-density boards require a framed stencil. Simple designs work better with frameless stencils. The stencil should match the output.
2. Choosing the right thickness is paramount. Fine-pitch components require a thinner stencil. Larger components require a thicker solder paste. Most boards you will find are 4-6 mils thick. Again, complex boards may require stepped stencils.
3. Performance depends on the choice of material. Stainless steel is a very good material for most applications. Nickel is suitable for fine pitch requirements. When the stencil is polished, it stencils better for solder paste. You should also know that the life of the stencil is affected by the grade of the material.
4. Once more, there are other things to be aware of. For instance, make sure that your printer has access to a wireless network. Make sure you have enough room for storage.
5. Another crucial factor is the manufacturing process. The highest precision is recommended here, such as laser cutting operations. Electroforming with ultra-fine pitch also applies. In addition, chemical etching is less expensive. Once more, component density should be the basis for your decision.
How Is a PCB Stencil Used?
1. Cleaning the bare PCB board of dust and oil is the first step. To align the stencil with the PCB pads, move it around. Make sure this is changed appropriately because it will impact the entire job.
2. Applying solder paste to the stencil’s edges is the next step. Take the squeegee and tilt it 45 degrees.
3. Another important step here is to apply the solder paste evenly and firmly. Brush again to make sure all the openings are well covered. Lift the stencil straight up to keep the paste deposited clean.
4. The board to make sure all of the pads are adequately covered with solder paste. Once more, use alcohol to swiftly wash away any dirt. Here, you must use caution. For example, if the solder paste is still wet and hasn’t dried, it’s time to place the components.
5. Next is reflow soldering. Remember that a good stencil is essential for good soldering results.
PCB Stencil Frame
The frame of the PCB stencil is critical for accurate PCB assembly. It keeps the stencil foil in place throughout the paste application process. The stencil frame keeps the tension consistent across the entire surface. If the frame is ignored, solder paste deposition will be inconsistent.
1. PCB Stencil Frame Materials
• Stainless steel is the primary metal material for stencil frames. It resists corrosion from cleaning agents. It is a stable material over a temperature range of 20-150°C with a coefficient between that of 304-grade steel, which most manufacturers use. Their tensile strength is 500-700 MPa. They have a life expectancy of over 50,000 print cycles. High-volume production lines contain them.
• The weight of aluminum frames is around one-third that of stainless steel. Common grades include 7075-T6 and 6061-T6. Tensile strength is between 200 and 400 Mpa, which is 40% less than that of stainless steel frames. They are also well-suited for prototyping and low-volume production. Aluminum frames typically last for about 10,000 print cycles.
• The new composite frames include carbon fiber and an aluminum core. They reduce weight by 60 percent. Their thermal stability is similar to stainless steel. Tensile Strength: 400-600 MPa These frames have a higher initial cost but last longer. They are more resistant to chemical cleaners than pure aluminum.
2. How Do I Choose a Material?
• Check the thermal expansion rate of the material. Output: Use the expansion rates of aluminum:23.6*10^-6 per degree Celsius and stainless steel: 17.3*10^-6 per degree Celsius, they correspond with your stencil foil. By doing this, the stencil foil won’t distort when being preheated for reflow.
• Strength guidelines: You shouldn’t forget about tensile and flexural strength as well. This means that the stencil frame must be able to withstand a tensile force of 30-45 N/cm. Under pressure, it should not bend more than 0.1 mm. But the larger the stencil, the higher the required material strength. For a 29-inch stencil, a tensile strength of at least 450 MPa is required.
• The material’s ability to withstand particular cleaning solvents. The pH range of modern frames is usually 4–11. Although stainless steel costs more, it is more resilient and long-lasting. This material is used in smaller quantities, like aluminum, but saves money. Consider how often they need to be replaced. Consider maintenance costs.
3. Production Requirements
Frames with a lifespan of over 50,000 uses are necessary for the majority of high-volume terminals. Multiple continuous printing shifts must be supported by the frames. For better stability, consider frame mounting systems. These systems have built-in tension mechanisms. It’s also important to choose materials with fatigue resistance over 200 MPa for all-weather operation. In big quantities, it also makes it possible to precisely manage the thickness of frames.
4. Environmental Factors
The surrounding environment is critical to the performance of the frame. As a result, you must follow the right procedures. For instance, keep an eye out for changes in temperature. For best results, temperatures should be controlled within ±5°C. Humidity control is also important, with temperatures between 35-65% recommended. Again, another good practice is to place the temperature sensor close to the stencil handling unit. Turn on the humidity indicator inside the cabinet. Anti-corrosive coatings help protect against coastal salt air. Use cleanroom-specific materials. In addition, framing materials should meet your facility’s fire safety codes.
Conclusion
When it comes to producing accurate solder pastes for SMT, stencils are essential. The arrangement and quality of the components are greatly influenced by the stencil’s quality. Likewise, you have learned that framed, stepped and frameless stencils are suitable for different requirements. Therefore, the right materials, methods, and use are critical. Contact us for in-house production of rapid circuit board assembly.
Latest Blog


Contact Info
Phone: +86-755-82882936
Email: [email protected]
WhatsApp: +86-13570802455
Wechat: +86-13570802455
Address: 2nd floor,D Bldg.,Electric Link Technology Bldg.,Gongming,Guangming New Dist.,518106 Shenzhen, China